If you need a hand, email support[at]thethemefoundry[dot]com.
Setting a custom background
Navigate to Appearance → Background in your WordPress dashboard to quickly add a custom background image and/or background color.
Setting up projects
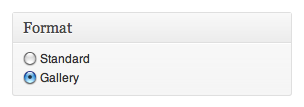
Projects are powered through your blog posts. To make a post a project change the Post Format to Gallery. Once a project has been changed to the Gallery Post Format it will be noted on the blog and automatically pulled into any page that you setup to use the Projects page template.
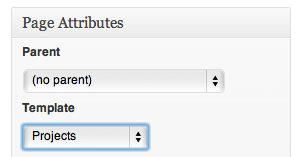
To setup a Projects or Portfolio page: create a new page, give it a title, and select the Projects page template. Once the page has been published you may add it to your menu from Appearance → Menus.
You also have the option to change the sort order of your Projects page and the name of the label applied on the blog posts or hide projects on the blog (see Projects section below for more details).
Creating multiple Project pages (advanced)
If you’d like to create multiple Project pages with each showcasing different projects/galleries, you’ll need to do the following:
- Add a new empty page named “My Projects” (or whatever you want to name your projects page), choose the “Projects” page template (see above), and save your page.
- Go to the Edit Post screen for the project post you want to include.
- Get the ID of the Post: Look at the URL of the Edit page. It should look something like
http://www.yoursite.com/wp-admin/post.php?post=123&action=edit.post=123indicates the ID of your project post (123 in this example). - Go back to the Edit screen for the “My Projects” Page you created in step 1
- Insert
[gallery project_id="123"](make sure to add quotes around the ID) into the content of the page. - Repeat 2-5 for all projects you want to include, and you’ll have a custom Projects page.
[gallery] shortcode, otherwise WordPress will ignore all shortcodes after the first.Setting up pages
Believe it or not, our front page on the demo site uses the default page template. The key is to set a featured image for your page and adjust your footers from Appearance → Theme Options → Layout.
Theme Options
Custom logo image
React allows you to add a custom logo in the header with the option of adding a hi-resolution version of the logo.
- Check the Enable custom logo image box to show your logo. You can uncheck this box to disable the custom image at any time.
- Add a link to the logo image in the Logo URL field or upload a logo via the Upload Logo link.
- Optionally, add a link to a hi-resolution version of the logo by adding a link to the hi-resolution version of the image in the Retina Logo URL field or uploading the image via the Upload Logo link. For best results, the hi-resolution logo should be exactly twice the size of the regular logo image.
- Add alt text, text that is displayed in the event that the logo cannot load, in the Logo image <alt> tag field.
- Click Save changes.
Subscribe links
This is simple and straightforward. Check the boxes and enter the full links to your Flickr and Facebook pages. Enter only your Twitter ID for Twitter.
Typography
React has built in support for selected web fonts. To adjust your site’s typography:
- Navigate to Appearance → Theme Options;
- Under Typography, choose a Primary font. Note: Using custom fonts will add weight to your page. If you want the fastest page load times, choose Helvetica;
- Click Save changes.
Layout
You have the option to disable the sidebar on your blog. You also have the option to control where different footers are displayed. There are three footers:
- Widgets footer: Controlled via Appearance → Widgets.
- Latest news footer: Displays excerpts from your latest three posts.
- Recent projects footer: Displays your three latest posts set to the Gallery post format (projects).
Projects
Project items are automatically shown on your blog. If you would like to hide project items from the blog check the “Hide project items on the blog” box.
You may change the label that is applied to projects on the blog and in the “Recent projects” footer. For example, you could use “Case study” for the singular project name and “Case studies” for the plural project name.
You also have the option to set the sort order of your projects on any page that uses the Projects page template.
Footer
You can add a custom copyright line to the footer of your site. To do this:
- Go to Appearance → Theme Options;
- Under Footer, enter your custom message;
- Click Save changes.
Creating pages
With sidebar page
To create a page with a sidebar, you will need to use the With Sidebar page template.
- Navigate to Pages → Add New;
- Enter a title for your page;
- Under Page Attributes, select the With Sidebar template;
- Click Publish.
Sitemap page
To create a Sitemap, you will need to use the Sitemap page template.
- Navigate to Pages → Add New;
- Enter a title for your page (Sitemap, for example);
- Under Page Attributes, select the Sitemap template;
- Click Publish.
The Sitemap page will be automatically generated; no need to write a single word.
Image dimensions
Where a height is not provided, feel free to insert your own custom value.
Project thumbnail:
- Width: 600px
- Recommended height: 450px
Blog post image:
- Width: 490px
Blog post featured image thumbnail:
- Width: 120px
- Recommended height: 75px
Page featured image:
- Width: 400px
- Height: 300px