If you need a hand, email support[at]thethemefoundry[dot]com.
Using post formats
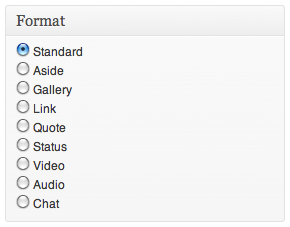
Chalk supports 9 post formats, selectable from the Edit Post screen: Standard (text), Aside (to-do list), Gallery, Link, Quote, Status, Video, Audio and Chat. Whenever you create a new post, choose an appropriate post format and follow the instructions below.
Posting articles
Articles work just like regular WordPress posts, leave the post format set to Standard and create your post.
Posting to-do lists
Select Aside from the post format box. Then, create an unordered list. Separate each task into a new list item by pressing enter/return on your keyboard.
To mark a task as complete, highlight the text of a particular list item, then apply the Strikethrough styling (as shown below).

Posting galleries
Select Gallery from the post format box. Then, complete the following steps:
- Upload your image files via the Add Media icon.
- Click “Save all changes”.
- Customize your gallery settings (optional).
- Click “Insert gallery”.
Your images will now show using Chalk’s native slideshow display. The post title and meta will not display, only the gallery you created will be shown.
Would you like to autostart your gallery? If yes, please read through the section of this theme’s documentation about enabling gallery autostart.
Of course, you can also use the default WordPress gallery in the Standard post format.
Posting links
Select Link from the post format box and type your link title into the post content editor. Next, highlight the text you just entered, and create your link by clicking the link icon in the editor. The post title will be ignored; only the linked text you entered will be shown.
Posting quotes
Select Quote from the post format box and type or paste your quote into the post content editor. Your quote will now display using Chalk’s custom Quote post format styling. The post title will not display, only the quoted text you enter will be shown.
Posting status updates
Select Status from the post format box and type a brief message into the post content editor. Your status update will now display using Chalk’s custom Status post format styling. The post title will not display, only the text you enter will be shown.
Posting videos
Select Video from the post format box. Paste your embed code into the post content area. The post title and meta will not display, only the video you embed will be shown.
Posting audio
Select Audio from the post format box. Then, upload your audio files via the upload media icon at the top of your post editor. You may also add a description for your audio files in the post content area.
If you choose to upload multiple audio files, a playlist will automatically be created.
Posting chats
Select Chat from the post format box. Then, create an unordered list. Separate each line of dialogue into a new list item by pressing enter/return on your keyboard. Your conversation will now display using Chalk’s native chat styling.
Styling
Chalk features a number of custom styles that will make your content stand out even further. Below are instructions for adding these custom styles to your content.
Alerts
Alert styles call attention to specific sections of your content. To style an alert, you will need to be in HTML editor mode. Then, wrap your content in a div with a class name of “alert”, like so:
<div class="alert">Your content here.</div>

Green “success” alert styling:
<div class="alert success">Your content here.</div>
Red “error” alert styling:
<div class="alert error">Your content here.</div>
Post-it
To style a small post-it box, you will need to be in HTML editor mode. Then, wrap your content within pre tags, like so:
<pre>Your content here.</pre>
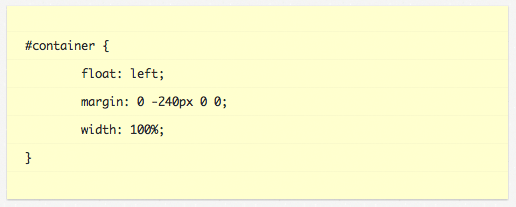
This styling is not intended to for long bodies of text.
Using the slideshow in posts and pages
To enable a slideshow on a page or non-gallery post, add your gallery; then, paste the following shortcode into your page content, replacing the default [gallery] shortcode:
[gallery slider="true"]
Using the regular [gallery] shortcode will remove the slider styling and return to the default WordPress gallery.
Enable gallery autostart
To autostart a slideshow within a gallery post, add your gallery; then, paste the following shortcode into your post content, replacing the default [gallery] shortcode:
[gallery autostart="true"]
To autostart a slideshow within a page template or non-gallery post, include autostart="true" into the shortcode, like so:
[gallery autostart="true" slider="true"]
Creating pages
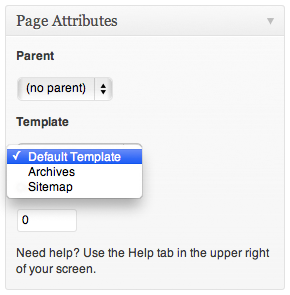
Chalk has three available page layouts, including the Default, Archives and Sitemap templates.
In your WordPress dashboard, navigate to Pages → Add New and select one of the three templates available from the Template drop-down; your content will be formatted accordingly.
Archives and Sitemap pages
The Archives and Sitemap pages on the demo site are created using the corresponding page templates. Select “Archives” or “Sitemap” from the Template drop-down to set the specifically formatted display for these page types.
Adding a Feature Image
Chalk’s Feature Image will display above your post content. To add a Feature Image to your post, you need to complete two steps:
- Create an image with dimensions of 760 x 300 pixels or larger.
- Set a Featured Image within your desired post.

Not sure how your Featured Image should look? Take a look at this example on the demo site.
Customizing
Setting a custom background
In your WordPress dashboard, navigate to Appearance → Background. This will display the options available for adding a custom Background Image and/or Background Color.
Change the color scheme
In your WordPress dashboard, navigate to the Appearance → Theme Options page. Under the “Fonts & Colors” section, enter your Primary and/or Secondary color value into the corresponding input fields, or feel free to use the color pickers for convenience.
Typography options
In your WordPress dashboard, navigate to the Appearance → Theme Options page. Under the “Fonts & Colors” section, there are two options for controlling the font families used across your theme.
The Accent font is used for headings, block quotes, buttons, menus and other highlighted areas.
The Body font is used for your post copy and all other content that is not styled by the Accent font.
Display options
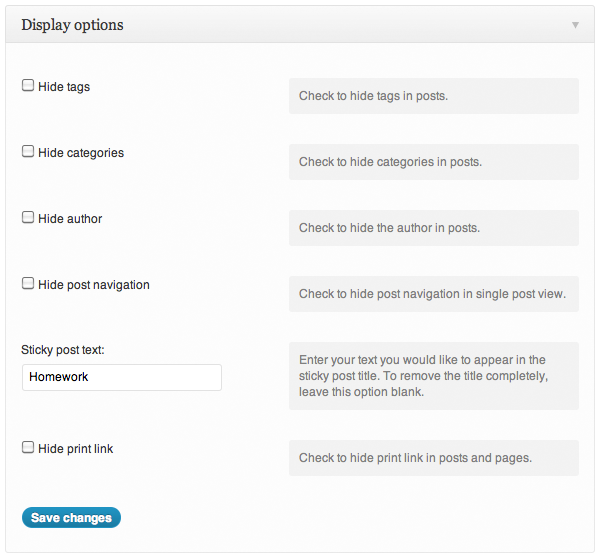
Chalk allows you to easily remove the author’s name, post navigation, print link, tags and categories from the post display. In your WordPress dashboard, navigate to the Appearance → Theme Options page. Under the “Display options” section, check the appropriate options to prevent them from displaying on all posts and pages.
Sharing buttons (Facebook, Twitter, Flickr, Google+)
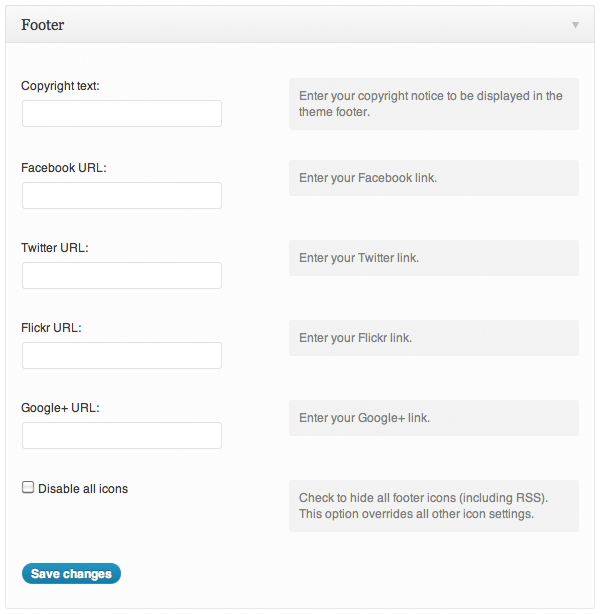
Your sharing buttons are controlled under the “Footer” section of the Appearance → Theme Options page. To disable all footer icons (including RSS), check “Disable all icons”.
Footer byline
The input field for your footer Copyright text is found above the sharing options, under the “Footer” section of the Appearance → Theme Options page. By default, this is left empty.
Image dimensions
Where a height is not provided, feel free to insert your own custom value.
Blog post featured image:
- Width: 760px
- Recommended height: 300px
Blog post image:
- Width: 626px
Gallery blog post image:
- Width: 760px
- Recommended height: 500px
