If you need a hand, email support[at]thethemefoundry[dot]com.
Posting overview
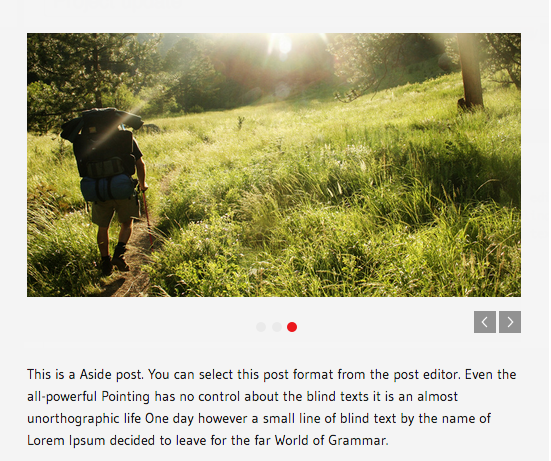
Portfolio supports 3 post formats, selectable from the Edit Post screen: standard (text), Aside (Updates) and Image.

The post format you choose determines how your post will look.
Standard: Posting articles
Articles work just like regular WordPress posts:
- Navigate to Posts → Add new
- Enter a title for your post
- Select the Standard post format
- Add your post content
- Click Publish
Image: Posting images
To publish a single highlighted image:
- Navigate to Posts → Add new
- Enter a title for your post
- Select the Image post format
- Set a Featured Image
- Click Publish.
Aside: Posting updates
To share a brief update:
- Navigate to Posts → Add new;
- Enter a title for your post;
- Select the Aside post format;
- Add your post content;
- Click Publish.
Image dimensions
Where a height is not provided, feel free to insert your own custom value.
Featured slider image:
- Width: 860px
- Height: 450px
Portfolio item thumbnail:
- Width: 242px
- Height: 135px
Blog post image:
- Width: 730px
Full width image:
- Width: 860px
Page featured image:
- Width: 860px
Styling your content
Portfolio adds a set of buttons to the visual editor; these buttons allow you to easily format your content with Portfolio’s custom typographic elements.

View the styling example page to see these various buttons in use.
Using the featured slider
To make a post “featured”, follow these steps:
- On your admin dashboard, go to Posts → All Posts;
- Click “edit” to get to the Edit Post screen for the post you want to add to the slider;
- Find the “Portfolio Theme Post Options” meta box:

- Check the “Show in featured slider” box;
- Make sure you’ve set a featured image for the post;
- Save the post, and you’ll now see your post in the slider!
Configuring the featured slider
In your WordPress dashboard, navigate to the Appearance → Theme Options page.
![]()
Under the “Logo & featured slider” section, you can toggle the featured slider’s autostart behavior as well as choose the animation effect for the slider (fade or slide).
Using the slider on posts and pages
Enabling a slideshow slider on a page or post is as easy as adding a gallery to your page or post and modifying the shortcode.
- Add a gallery to your page or post
- Click the Text tab above the editor to view your content in text only mode
- You should see a
galleryshortcode with a list ofids, (e.g.,[gallery ids="743,741,749"]) - Add the argument “
slider” with value “true” to the shortcode. For instance, if your shortcode appears as[gallery ids="743,741,749"], you should modify it to[gallery ids="743,741,749" slider="true"] - Save the page or post
If you followed these steps, you will have a slideshow similar to the one shown in the image below:
Enabling gallery autostart
To autostart a slideshow in your post and pages, add your slideshow gallery; then, append the “autostart” argument with value “true” to the [gallery] shortcode. For instance, you should have a shortcode similar to the following:
[gallery ids="743,741,749" slider="true" autostart="true"]
Creating a portfolio
Setting up your portfolio involves 2 main tasks: creating your portfolio items and placing them on your portfolio pages. Portfolio items and pages can be created in any order, and we’ll go over the process for setting them up in detail.
You’ll notice the words portfolio item are always in italics – this is because a portfolio item is just a regular old WordPress post with some extra information associated with it. In the following sections you’ll learn how to set up your portfolio items, but if you remember: “A portfolio item is just a post” our instructions will (hopefully) make more sense!
Creating a portfolio item
First, we’ll look at how to create your portfolio items. Each portfolio item represents an individual project, album, work of art, etc. Portfolio items are given a special display on the Portfolio and Homepage page templates, and have a unique look in the “single” view:
To create a portfolio item, follow these steps:
- On your admin dashboard, go to Posts → Add New;
- Make sure your post is standard format (it will be by default);
- Fill in the post title and content;
- Set a featured image for your post;
- Find the “Portfolio Theme Post Options” meta box;
- Check the “This is a portfolio item” box;
- Save/publish your post, and you’re done!
Adding content to your portfolio item sidebar
One of the nifty features of portfolio items is the extra details you can add to the sidebar.
This is demonstrated on the demo site, and it’s actually pretty simple to set up! Portfolio Theme uses the manual excerpt of a post to populate this information.

Manual excerpts are typically short explanations of the post. For your portfolio items, you may want to use the excerpt to include some detailed information about the item: project dates, client names, or materials used – really, anything that is relevant to this project.
Whatever you put in the excerpt box will be used to fill in the sidebar of your portfolio item. If the excerpt box is left empty, the sidebar will not appear.
Editing the short description on the Homepage and Portfolio page templates
On the Portfolio and Homepage page templates, portfolio items are displayed with a short snippet of text. This is grabbed from the beginning of the manual excerpt or content by default, but if you want to have complete control over the short description, you can use the text area provided below the “This is a portfolio item” checkbox:

The text you put here will be used on the Portfolio and Homepage page templates instead of the default text.
Creating a portfolio page
Portfolio pages display your portfolio items in grid format, allowing your visitors to browse the items and click through to the items that interest them.
To create a Portfolio page, go to Pages → Add New on your admin dashboard. Select the “Portfolio” template, give your page a title, save the page and you’re done!
Assigning portfolio items to a portfolio page
You can place your portfolio items on your Portfolio pages using the Portfolio Page Options meta box, typically located in the righthand sidebar of the Edit Page screen:

This box allows you to add, remove and rearrange your portfolio items on the page easily from the Edit Page screen. Check/uncheck items to add/remove them from the page, and drag checked items to reorder them. Click “Update” to save your changes, and the items on the page will be updated.
Setting up your Homepage
To create your Homepage, go to Pages → Add New on your admin dashboard. Select the “Homepage” template, give your page a title, save the page and you’re done!
The Homepage template is made up of 2 major elements: the recent portfolio items in the footer, and the featured slider.
The recent portfolio items are automatically populated using the 3 most recent posts marked as portfolio items.
Using other page templates
Portfolio also includes three other page templates: default, “With Sidebar” and Sitemap.
- The default template is “full-width” and will display your content without a sidebar.
- The “With Sidebar” template will add your sidebar to your content.
- The Sitemap template builds a user-friendly sitemap automatically linking to your pages, posts, categories, tags and archives.
Add a Featured Image to pages
Pages can also use Featured Images. When you set a Featured Image for a page, it appears above the content as seen on the demo site About page.
To set a Featured Image, check out the “Setting a Post Thumbnail” section of this Featured Image tutorial.
Customize
Setting a custom background
In your WordPress dashboard, navigate to Appearance → Background. This will display the options available for adding a custom Background Image and/or Background Color.
Fonts & colors
In your WordPress dashboard, navigate to the Appearance → Theme Options page. Under the “Fonts & Colors” section, there are two options for controlling the font families used across your theme.
The Accent font is used for blockquotes.
The Body font is used for your post copy and all other content that is not styled by the Accent font.
In addition, you can change the primary color for your site. The primary color is used primarily for link coloring, but is also used for buttons and other accents.
Display options
Portfolio allows you to easily remove the author’s name, post navigation, post date, tags and categories from the post display. In your WordPress dashboard, navigate to the Appearance → Theme Options page. Under the “Display options” section, check the appropriate options to prevent them from displaying on all posts and pages.
Within the “Display options” section, you also have the choice to toggle on or off Portfolio’s unique image loading effect, and the option to set a custom sticky post title.

Subscribe links
Sharing buttons are controlled under the “Subscribe links & copyright” section of the Appearance → Theme Options page. To disable all footer icons (including RSS), check “Disable all icons”.
Footer byline
Under the “Subscribe links & copyright” section of the Appearance → Theme Options page, you will find the input field for your footer Copyright text. By default, this field is left empty.
Using keyboard navigation
When viewing the Homepage template, you can use the left and right arrow keys on your keyboard to navigate through images in the Featured Slider.