
Add captions to your Photography gallery page
By team on October 28, 2010
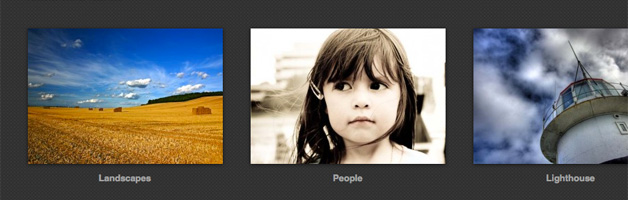
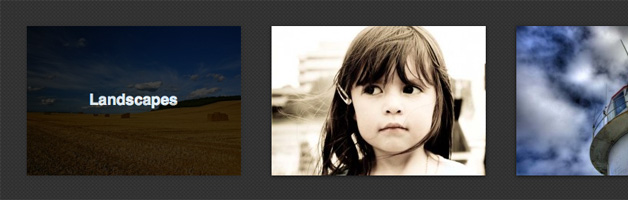
We have had several requests in the Photography theme support forum for instructions on how to add captions to the main gallery page. By default, Photography shows a “featured thumbnail” image of a chosen photo from your gallery with no text. In this tutorial I am going to walk you through adding two different caption styles to your gallery page. Let’s get started!
Edit the gallery template
We need to add the gallery title to our gallery template by editing the /photography_pro/gallery.php file. Be sure to read through the editing a template file tutorial before jumping in. Open up your freshly copied gallery.php file and find the code below (starts on line 23).
      </a>
    </li>
  <?php endwhile; ?>
</ul>
Add the post title template tag just above the closing </li> and wrap it in an <h5> (shown below).
      </a>
      <h5><?php echo the_title(); ?></h5>
    </li>
  <?php endwhile; ?>
</ul>
Add basic styling
The gallery title will now show up on your gallery page underneath each thumbnail, but it doesn’t have any styling. We need to add some CSS to clean things up a bit. Be sure to read through the adding custom CSS styles tutorial before you make any changes.
Open up your /photography_pro_child/style.css file and scroll all the way to the bottom.
/* Make all custom CSS changes BELOW this line
-----------------------------------------------------------*/
/* Example: Change the sidebar background to blue:
#sidebar {
    background: blue;
}
*/
Add some styling to the new <h5> element by replacing that code with the code below, which adds margin above the text, centers it, and makes it a bit larger.
/* Make all custom CSS changes BELOW this line
-----------------------------------------------------------*/
li.g-thumb h5 {
    margin: 10px 0 0 0;
    text-align: center;
    font-size: 1.3em;
}
Add fancy hover styling
If you prefer a fancier “hover only” caption use this code instead.
/* Make all custom CSS changes BELOW this line
-----------------------------------------------------------*/
#gallery ul li {
   height: 195px;
}
li.g-thumb h5 {
    display: none;
}
li.g-thumb:hover h5 {
    display: block;
    margin-top: -97.5px;
    font-size: 2em;
    line-height: 0;
    text-align: center;
    color: #fff;
}
#gallery ul li a:hover img {
    opacity: .25;
}
Here is a summary of each CSS property / value pair listed above.
- Hide the
<h5>tag by default. - Show the
<h5>tag when hovering over the thumbnail. - Add a negative margin to center the text vertically on the thumbnail.
- Increase the font size to 20px.
- Zero out the line height so the negative margin we specified above works properly.
- Center the text.
- Set the color to white.
- Turn down the opacity on hover so the text is more noticable.
Enjoy your captions!
These captions have been tested and are working in the latest versions of Firefox, Safari, Opera, and Chrome. The second hover method doesn’t look as great in Internet Explorer because it doesn’t support the opacity property (unless you are using the IE9 Beta).
Enjoy this post? Read more like it in Tutorials.