


Create a custom WordPress sidebar with Widget Logic
By team on June 27, 2014

If creating a custom WordPress sidebar sounds difficult, baffling, or all-out impossible, we’re here to destroy your apprehensions. There is a plugin called Widget Logic that gives you precise control over your WordPress sidebar widgets.
Widget Logic lets you display specific widgets on an individual page or group of pages. For example, if you want to display links to your social media profiles alongside individual posts but not on your “About” page, Widget Logic can make it happen. There’s a catch, though. Widget Logic requires you to add conditional tags to every widget – and adding conditional tags means learning a little PHP. If you don’t mind learning a little PHP, or already know how to edit code, keep reading.
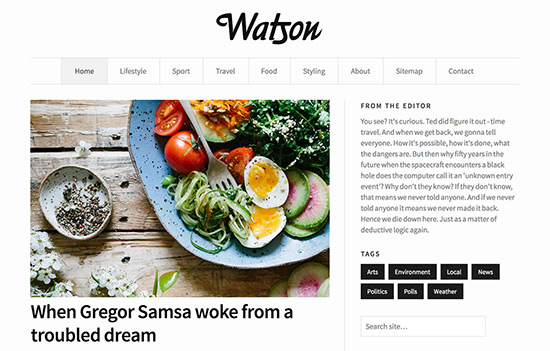
If you don’t feel like learning PHP, or have no interest in code, take a look at our Make WordPress theme. Make features a powerful drag and drop page builder, and when you upgrade to Make Plus, you’ll also get on demand widget areas and per page sidebar controls. Once you start using Make with Make Plus, you’ll have all the precise sidebar control you could ever wish for.
First, let’s look at some real-world examples of how you might use Widget Logic and go over the conditional tags you will need to know.
How to customize your sidebar using Widget Logic
Let’s assume you’ve already uploaded Widget Logic and activated it. You’ve also added a text widget to your sidebar and written some copy inviting readers to download a PDF version of your resume.
The thing is, you only want the content in this widget to appear in the sidebar of your “About” page. You know Widget Logic can make that happen, but you’re not sure how to proceed. Here’s how to use Widget Logic to solve the problem:
- Determine the conditional tag for your “About” page. Conditional tags for pages are based on a page’s slug or ID; you can choose which of those you prefer to use. Assuming your permalinks use the post_name slug (here’s why they should, if you’re interested), the slug for your “About” page will be
about. If the page title was “About Me,” it would beabout-me. In our example, we’ll assumeaboutis our slug for the page, which would make our conditional tagis_page('about'). - Locate the “Widget Logic” field in the widget editor. After activating the Widget Logic plugin, all of your widgets should display this field at the bottom of the editor interface.
- Enter the conditional tag for your “About” page in the “Widget Logic” field. The conditional tag for this page is
is_page('about'). Notice we used theaboutslug within the tag. - Click “Save”. After saving your modifications in the widget editor, this particular text widget will display on your “About” page and only on your “About” page.
If you’re still a little confused by the conditional tags, don’t worry! We’re about to show you a list of common conditionals you can use with the Widget Logic plugin. But first, we’ll consider another example.
Let’s say you want to list your five most recent posts in the sidebar of your blog page and alongside individual posts (in WordPress lingo, these are “single” posts). You’ve configured a widget that lists those posts, but now the list appears on every page of your website. How can you get it to display only on your blog and posts pages? Widget Logic can take care of this problem, too. Here’s what you do:
- Determine the conditional tag for your blog page. In WordPress, the conditional tag for your blog page is always
is_home(). This is true even if you have a static front page and use a URL likehttp://mydomain.com/blogfor your blog. - Determine the conditional tag for single posts. The conditional tag for single posts is
is_single(). The beauty of this tag is that it includes all of your posts, so you don’t have to list conditional tags for each of them one by one! - Add both conditional tags to the “Widget Logic” field. In our previous example, we only used one conditional tag. Here, we need to add two different tags to make the widget appear on the blog page and on the pages for every post. Here’s how to enter both tags:
is_home() || is_single(). - Click “Save.” Now your five most recent posts will appear in a widget on your blog page and next to all of your posts. Just remember that this content will only appear on those pages. If we want it to appear elsewhere, we would have to add additional logic (i.e. more conditional tags) via the plugin.
Did you notice how we used || between the two conditional tags? Think of this syntax as PHP-speak for the word “or.” In other words, if the page requested by a browser is the blog page (conditional tag: is_home()) or any single post (conditional tag: is_single()), WordPress will display this widget.
Conversely, the syntax && equates to the word “and.” You can use it to “tighten” your conditions and make widgets appear only on really specific pages. For example:
is_single() && in_category( 'nutrition' )
Under these conditions, WordPress will display a widget only on single posts (conditional tag: is_single()) that appear within a category entitled “Nutrition” (conditional tag: in_category( 'nutrition' )). Widget Logic makes arrangements like this possible. You can finally take control of your sidebar!
But what about all those conditional tags – how many are there, and how would you use them in “stickier” widget placement situations? Next, we’ll look at a list of conditional tags that might come in handy as you put Widget Logic to work.
Common conditional tags for Widget Logic
Here are some everyday conditional tags that will help you use the plugin. All are based on the conditional tags list from the WordPress Codex.
is_home()refers to the blog page whether your blog appears on your home page or somewhere else.is_front_page()is the conditional tag for your home page if you’ve set it up as a static front page in WordPress Settings.is_page( 'page-name' )is for a specific page on your website. Thepage-namepart comes from the slug that’s assigned to that page. You can also use the page ID (e.g.is_page(21)) in place of the slug. Usingis_page()will make a widget appear on every page except for single blog post pages.is_single()will make a widget appear on all of your blog post pages.in_category( 'category-name' )is the conditional tag for a particular category. In Widget Logic, this tag will make a widget display on every post in a category you specify.
Honorable mention goes to the ! character, which you can attach to the beginning of a conditional tag to eliminate associated pages from your logic. It’s most useful when you want a widget to appear everywhere other than a page that fits a certain condition. For example:
is_page( 'contact-me' )
On its own, this tag ensures a widget will appear only on your “Contact Me” page. Now look at this:
!is_page( 'contact-me' )
Now you’re telling WordPress that you want a widget to appear on every page that isn’t your “Contact Me” page. That’s a lot easier than typing a long list of conditionals for the pages where you do want the widget to display!
Need more? The Widget Logic notes and FAQ pages offer an extended list and some excellent examples of conditionals in action. You’ll also find advanced plugin tips and troubleshooting guidance.
Rather avoid PHP?
If you enjoyed our Widget Logic tutorial, read no further. Grab the plugin and start creating a custom WordPress sidebar right now. On the other hand, if this post contained all the PHP you ever want to see in your life, don’t forget to check out Make and Make Plus.
Photo Credit: baldiri
Enjoy this post? Read more like it in Tutorials.