How to customize a WordPress theme
By team on November 7, 2013
You’ve got WordPress set up, you’ve installed your favorite theme, and now you want more. You want to learn how to customize a WordPress theme so it looks just right. Where do you get started? How hard is it?
You might think the hardest part of the process is learning WordPress or doing something fancy with code. In fact, it’s learning a few basic concepts and applying them when you want to customize your theme. There are even some fantastic free tools and WordPress plugins available to make this process enjoyable.
The basics of CSS (cascading style sheets)
Oh no! CSS sounds complicated! It really isn’t, trust me. You’ll be a pro in no time. CSS at the core is a language (a basic one) for applying style (colors, fonts, layout) to HTML. HTML is what a web page (even a WordPress web page) is built on. Think of it like a doll that you can dress up in different outfits. The “body” of the doll is called HTML and “outfit” is called a CSS stylesheet. It’s a sheet of instructions for styling the HTML. Makes sense right? What if instead of actually choosing an outfit for your doll, you wrote down some instructions on a piece of paper for how the doll should be dressed:
- Pants: green
- Shirt: white
- Shoes: black, velcro
CSS works the exact same way! You specify selectors (the pants) and apply properties (green). The HTML provides convenient indicators, called ID’s and classes, that make it easy to target all kinds of different parts of your website. Let’s say you wanted to change some text in a certain section of your website. You’d write something like this:
.pants {
  color: green;
  text-decoration: underline;
  font-weight: bold;
}
.pants is the selector and color, text-decoration, and font-weight are the properties.
Now imagine you had all kinds of wacky things you could specify for your doll. That’s a bit like CSS. You’ll want to bookmark and study up on a decent CSS property reference guide.
Start to customize your WordPress theme
I know what you might be thinking. Where am I supposed to practice my CSS? How do I know if it’s working? Do I need to set up all kinds of advanced coding tools and local development environments? As cool as those tools are, no, you don’t need them to make some basic WordPress theme customizations.
Believe it or not, there is a magical tool built right into two major web browsers (Google Chrome and Safari). Google Chrome calls their version DevTools and Safari calls theirs Web Inspector. This tool actually gives you the power to make CSS changes to any website you’re browsing! This means you could do something crazy, like go to the New York Times and change all the text to blue!
Now before you get too excited, this only changes the website for you, not everyone else. But, that’s what’s really cool about it. You can learn how to customize your wordpress theme CSS files without any risk, on any website, including your own of course.
How do I turn it on?
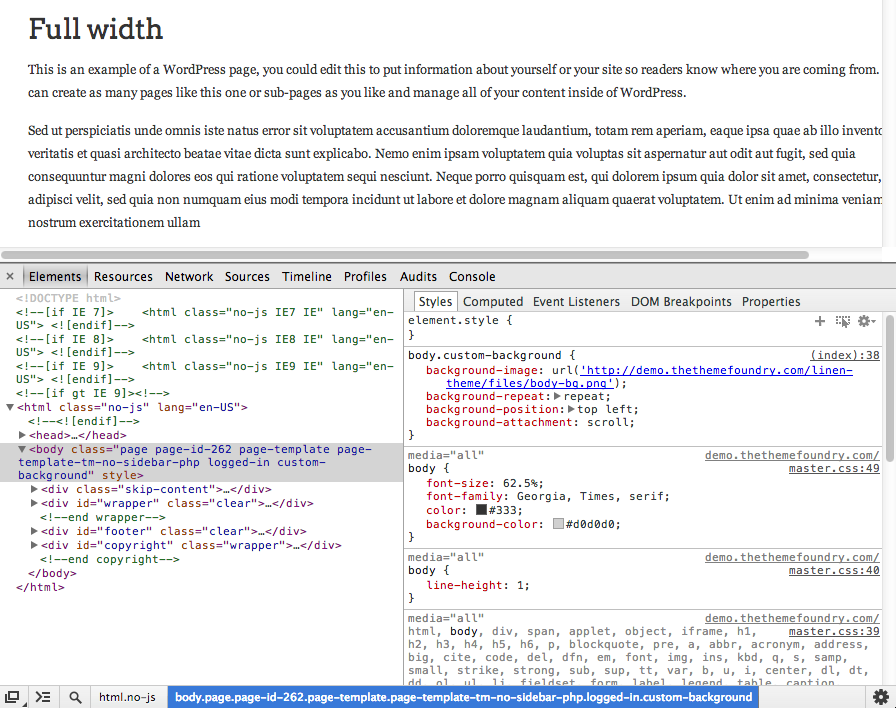
For Google Chrome, DevTools is on by default, you just need to toggle the window for it. I recommend doing this with keyboard shortcuts. Press Ctrl + Shift + I (or Cmd + Opt + I on Mac) to open the DevTools. If you’re using Safari you’ll have to first navigate to Safari → Preferences → Advanced, and check the box for “Show Develop menu in menu bar.” Once you’ve turned that on, you can use the same keyboard shortcuts mentioned above to toggle the window. It should look like this:
Real example
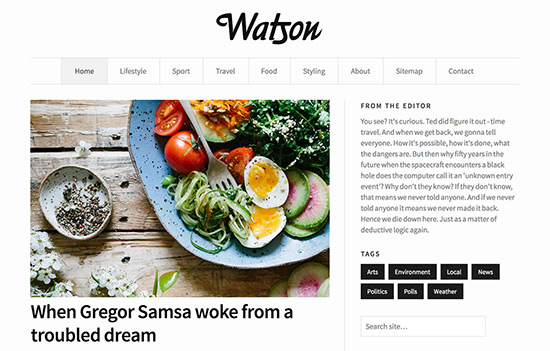
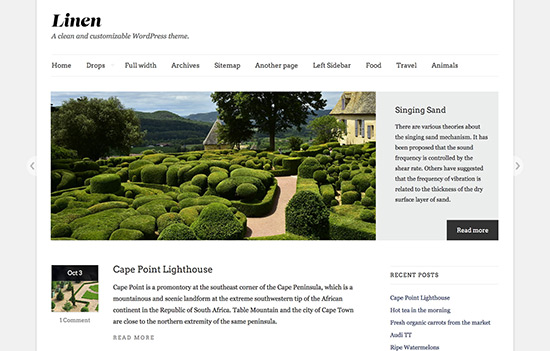
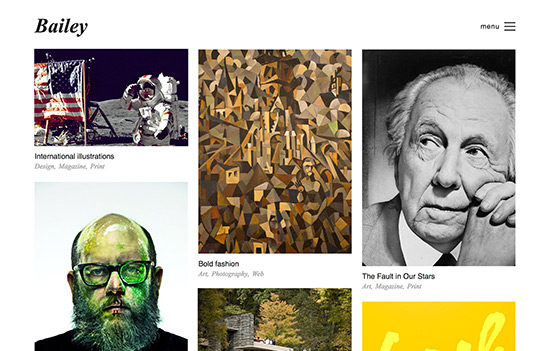
Now that you’ve turned it on, let’s walk through a real example. We’re going to use Google Chrome. Navigate to the Linen theme demo site. You’ll notice a subtle border above and below the navigation menu. Let’s practice changing the border color.
Open up your inspector tools using the keyboard shortcut I mentioned above and look for a small spyglass icon in the lower left hand corner of the panel. Click the spyglass.
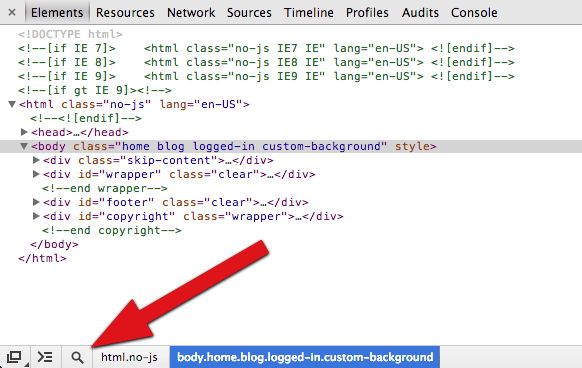
Now, start hovering your mouse cursor around the actual webpage. As you hover, the cursor is selecting different elements on the page. Think of this like targeting. Target the element you want to change. If you hover carefully you can even drill down a bit inside some of the elements. Whenever you click, the inspector “locks on” to that element. To change the element you’re locked on to, you need to click the spyglass icon again. Go ahead and click on the top navigation bar to lock on.
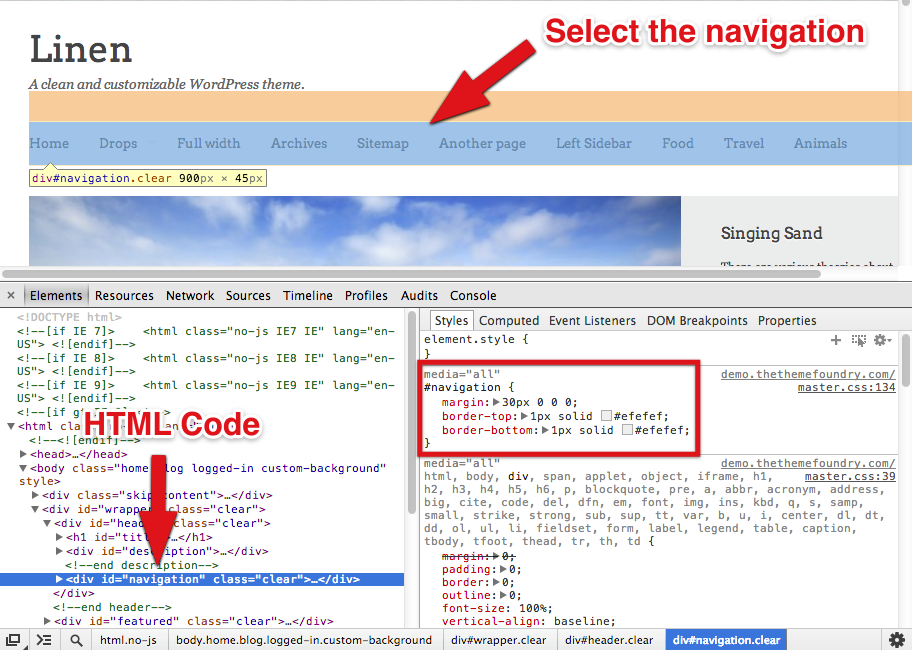
Look at the inspector panel. This is a little intimidating at first, but don’t worry, it’s not that bad. There is some code on the left and some code on the right. The one on the left is for the HTML (body of the doll) and the one on the right is for the CSS (the doll’s outfit). You’ll notice on the CSS side a set of CSS rules:
#navigation {
  margin: 30px 0 0 0;
  border-top: 1px solid #efefef;
  border-bottom: 1px solid #efefef;
}
The #navigation is the selector (the part of the doll we’re targeting) and the 3 lines inside the brackets are the styling instructions. Each line follows the same the format: property: value;. Remember discussing properties earlier? These are all the different options we have for styling our doll. The semi-colon goes at the end of each line to indicate the line has ended. This set of instructions looks like this in English:
- Add a space of 30 pixels above the navigation element.
- Add a 1px solid border in the HEX color
#efefefabove the navigation element. - Add a 1px solid border in the HEX color
#efefefbelow the navigation element.
Let’s try changing the border color.
You might be wondering what HEX codes are. They sound complicated, but they’re just 6 character letter / number representations of colors. Google Chrome has a nice HEX color picker built right in. Click the color square for the border-top property and choose a new color.
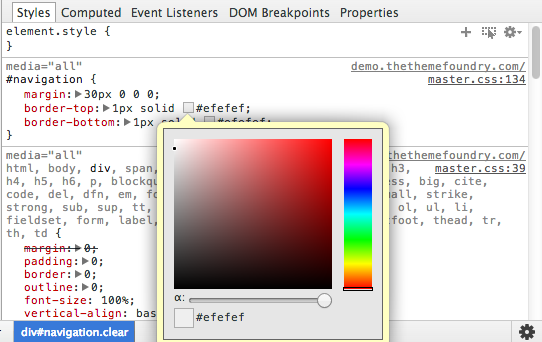
Notice how the top border actually changes live while you choose a color! Now, try changing the bottom border to a different color. Nice work! You’re on your way to being a professional WordPress theme customizer.
Making it permanent
Remember what we discussed earlier about these changes only showing up for you? The tool only provides a preview of how it would look if you did make the changes, it doesn’t actually change your live website. The next step is to take your changes and apply them to your theme. Your WordPress theme has a CSS file that holds all of these style rules.
The easiest way to edit your CSS file is to visit Appearance → Editor from your WordPress dashboard. You’ll want to open the style.css file (which should be open by default). This is your stylesheet. These are all the instructions for how to dress your doll. The specific instruction blurb you changed in our example above actually exists in that file.
Search for the style rule you changed in the browser and actually change it for real!
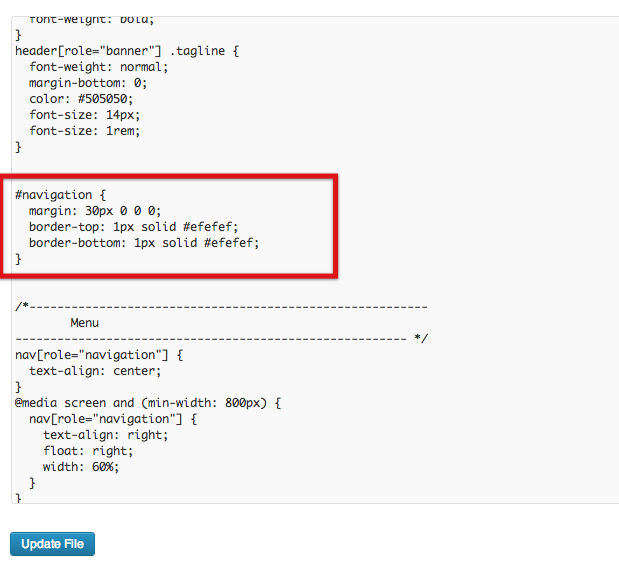
Now click the Update File button below the editor. Visit your site and the changes should now be live. Nice work!
Power up with a child theme
Two problems pop up when you start changing your theme’s stylesheet:
- If the developer of the theme ever releases an update, and you update your theme, all your changes will be lost.
- It’s easy to make a mess of the original code, and forget what exactly you changed.
Luckily, WordPress has support for child themes, which help you sidestep this problem. So, before you get started with your customizing, learn how to use a WordPress child theme. You should also know, we include child themes with all of our WordPress templates here at The Theme Foundry.
Wrapping it up
We obviously just scratched the surface of customizing a WordPress theme, but hopefully you’ve got a better fundamental understanding of how to customize a WordPress theme. If you want to get more advanced, you’ll want to study more about CSS and how it relates HTML. These are building blocks of your WordPress theme.
Are there any other customization concepts you’d like to learn about? Drop us a note in the comments.
By the way, if you’re interested in created a membership website, check out Memberful or collectiveray.com membership tools list.
Enjoy this post? Read more like it in Tutorials.