3 WordPress Media Manager tips
By team on March 20, 2014

The WordPress Media Manager was improved dramatically in WordPress 3.5. Even with all the improvements, the Media Manager can still be intimidating if you don’t have much experience with it. Here’s 3 tips on getting the most out of the WordPress Media Manager.
1. Drag and drop everywhere
You might be aware that you can drag and drop photos or files to the WordPress Media Manager, but did you know you can do it from any view in the Media Manager? You don’t need to switch to Upload Files every time you want to upload a photo or file. Whether you’re on the Insert media view, the Create Gallery view, or the Set Featured Image view, you can drag and drop images straight into the window.
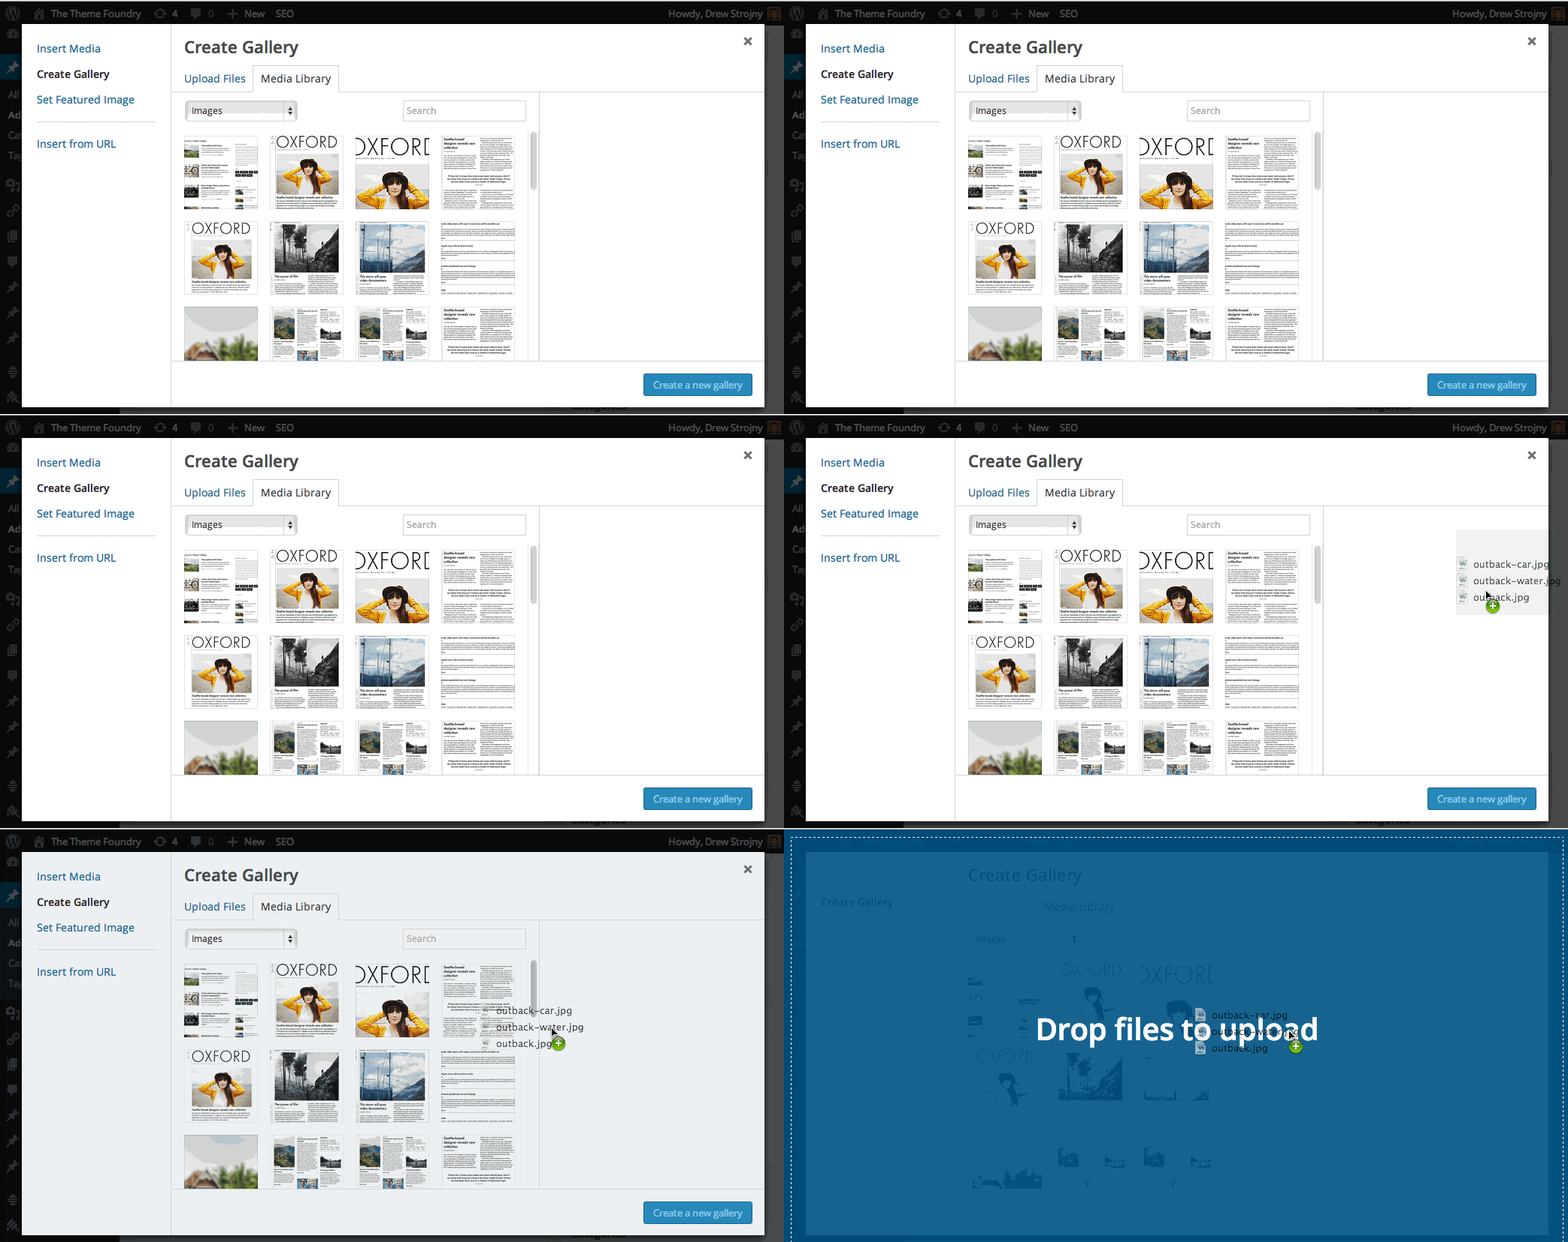
You can also drag multiple images directly into the Media Manager. This makes it easy to upload an entire gallery of photos.
If you want to edit an existing gallery and add new images, you don’t need to add them one by one. Edit the existing gallery and drag them right in.
2. Filter out old photos
Sometimes the amount of thumbnail images in the WordPress Media Manager can be overwhelming. You just uploaded a new set of photos, but you’re still seeing lots of old photos mixed in with the new. Look for the select box labeled Images just above the thumbnails and switch it to Uploaded to this post.
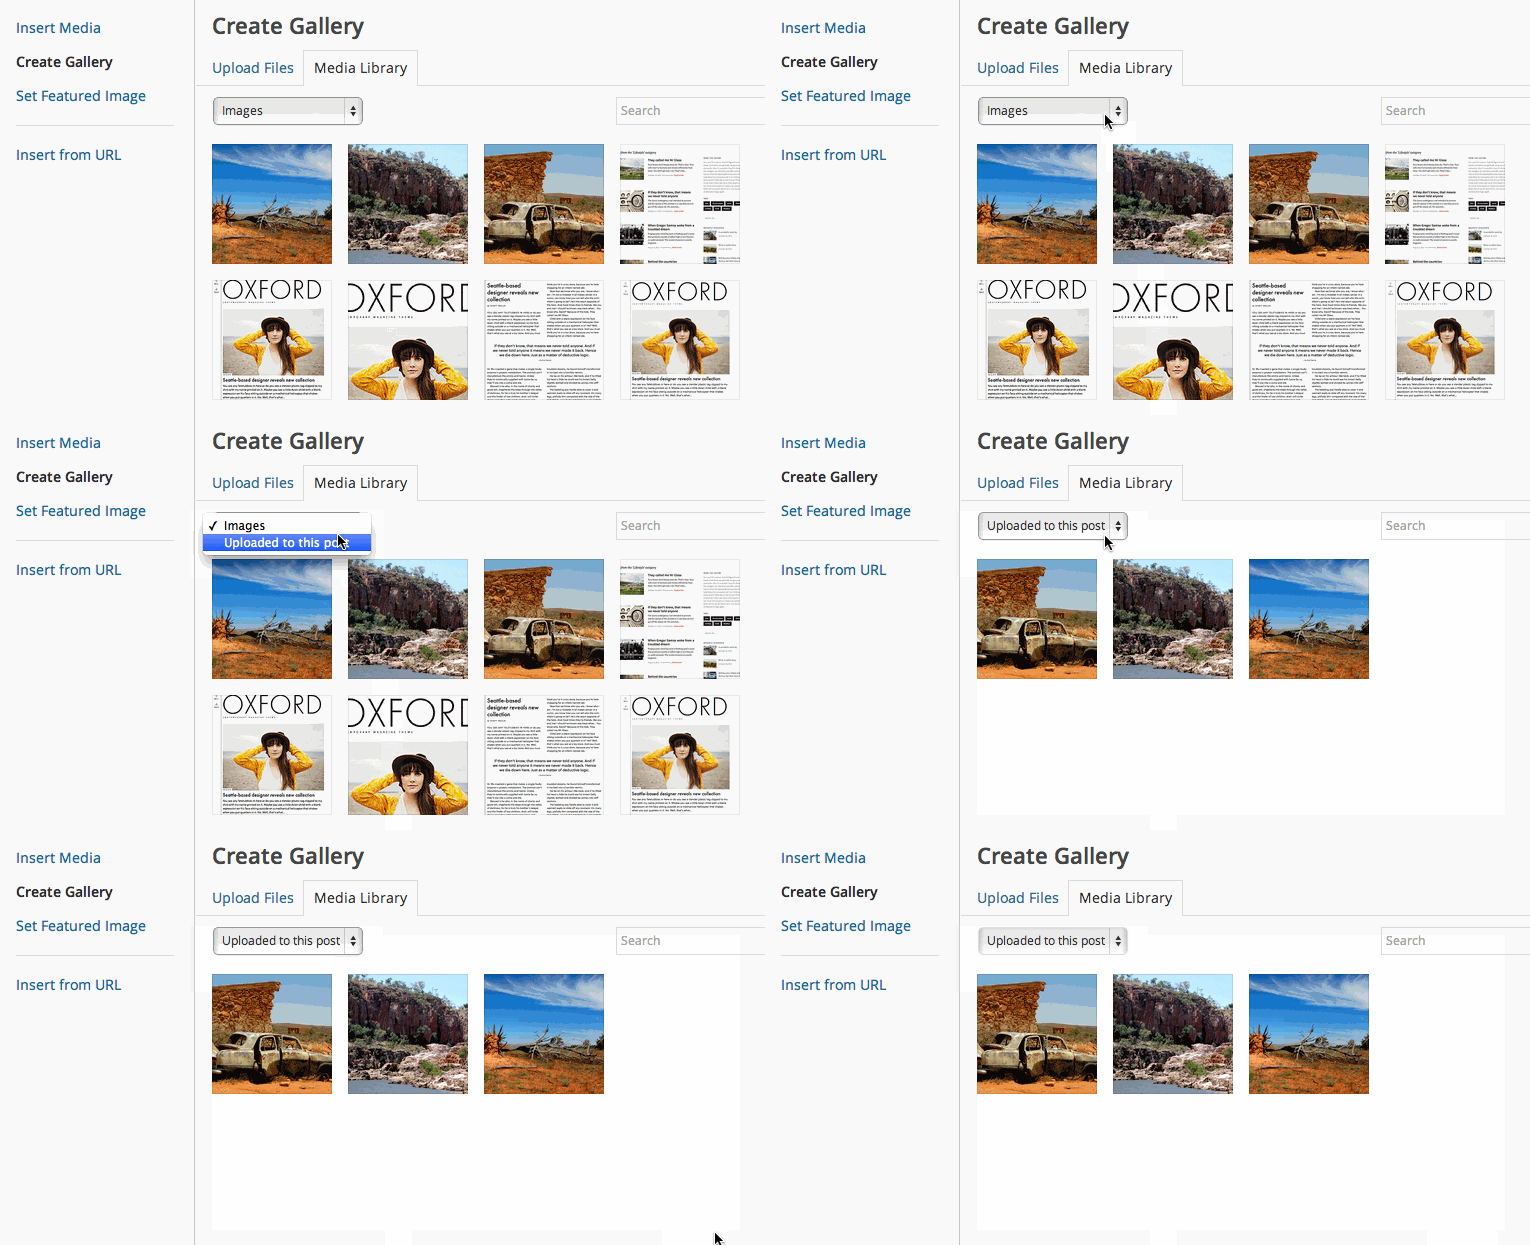
Changing this filter will only show photos you’ve uploaded while editing the current page or post. This makes it much easier to focus on labeling and organizing the gallery you’re working on.
3. Change the default attachment display settings
If you run an image heavy blog or upload lots of photos you might start to get frustrated by the WordPress default attachment settings. These settings determine the image alignment, where the image links to, and the image thumbnail size.
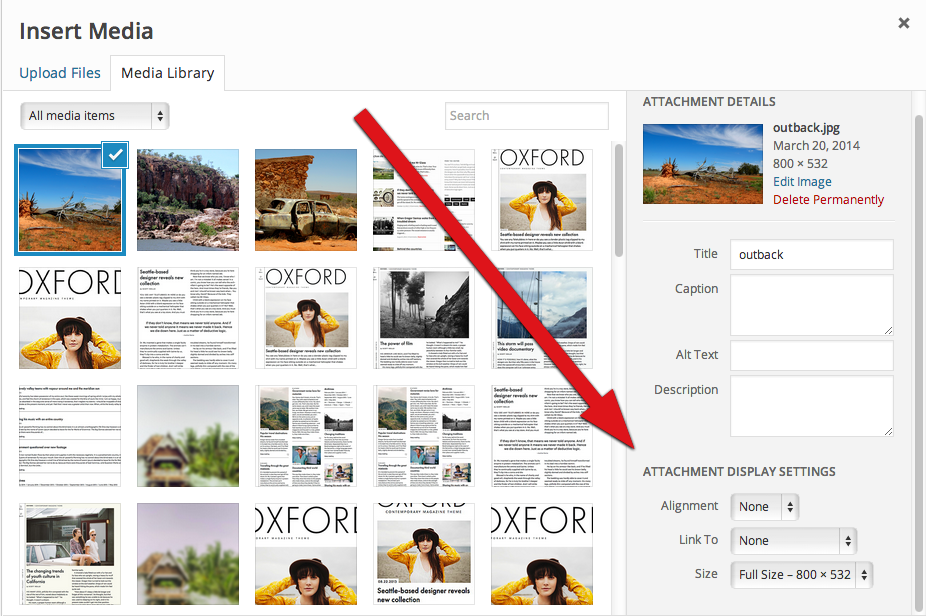
If you consistently use something other than the defaults, it can be tedious to change the setting every single time you upload an image. Without a doubt, the most commonly requested change is where the image links to. By default, this is set to “file”, which links to the external image file. To change the default settings for images, you’ll need to go to a hidden settings page within WordPress by navigating to /wp-admin/options.php. Here’s the step by step instructions:
- Sign in to your WordPress dashboard.
- Click on the browser URL bar.
- Remove everything after
/wp-admin/. - Add
options.phpto the end of the URL and press Enter.
You’ll be presented with a ton of WordPress settings. Search for image_default_link_type. Here’s the options you can use for that setting:
file: Links to the file itself (the default).none: No link.post: Links to the image attachment page. This might have some more styling if your WordPress theme supports it.
You’ll also see image_default_align which has these options:
- Leave it blank (the default) and it will use “None”.
left: Aligns to the left.right: Aligns to the right.center: Aligns to the center.
Finally, you’ll see the image_default_size option, which has these options:
- Leave it blank (the default) and it will use “Full Size”.
thumbnailmediumlarge
These sizes are controlled from Settings → Media. You can also set a custom image size and reference it using these options.
What about you?
Hopefully you’ve found these WordPress Media Manager tips useful. If you have any tips of your own, be sure to let us know in the comments.
Enjoy this post? Read more like it in Tutorials.
