Easy Upgrading With Child Themes
By team on September 23, 2008
A quick tutorial on using WordPress “Child Themes” to upgrade Vigilance while maintaining your custom CSS, adding custom functions, and eventually adding custom templates (WordPress 2.7) adding custom templates.
Important: You will need Vigilance 1.1 or later for the child theme to work correctly. If you are running an older version of Vigilance, upgrade now.
Step 1: Download
Download this basic child theme for Vigilance:
Step 2: Unzip and Upload
Unzip and upload this theme into your wp-content/themes directory just as you would any other theme.
Note: The theme must be in it’s own directory, just like any other theme, e.g. themes/my_vigilance

Activate the Child Theme
Step 3: Activate
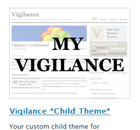
Log in to your WordPress installation and click Appearance then Themes. Find the child theme, it will look like the image on the right. Click on the theme and activate it.
Step 4: Customize
You can now make all of your custom CSS changes from within the child theme. Simply edit the style.css file. You can find it in your /themes/myvigilance folder. You can also add custom functions and template files. These changes will work as long as you have the child theme activated.
How It Works
Your new child theme inherits all of the templates and styles from the parent theme (Vigilance in this case), but any styles added in the style.css file in the child theme’s folder will override any default theme styles. You may also include custom functions by adding them to the included functions.php file. When WordPress 2.7 is released you will be able to use custom templates in your child theme. . You can now use custom templates in your child theme.
Enjoy this post? Read more like it in Tutorials.


