

Widget management in the WordPress Theme Customizer
By team on June 2, 2014

Prior to April, 2014, modifying WordPress widgets posed a serious editorial challenge. To view any changes made to a widget, publishers had to click “Save,” navigate to a website’s front end, and examine the published modifications. Any mistakes would already be visible on the live website.
Thankfully, the release of WordPress 3.9, Smith, took care of this issue for good. By merging the popular Widget Customizer plugin into the WordPress Core, the latest update lets users enjoy live widget previews before publishing any changes.
Here, we’ll show you how to use this new feature and improve how you work with widgets. Never again will you publish widget content without previewing it first – and that’s a beautiful thing.
Note: The terminology WordPress uses for features incorporated from the Widget Customizer plugin is “Widget Management.” These features are found within the WordPress Theme Customizer area of your Dashboard. To maintain consistency and avoid any confusion with retired Widget Customizer plugin, we will use the new naming convention throughout this tutorial.
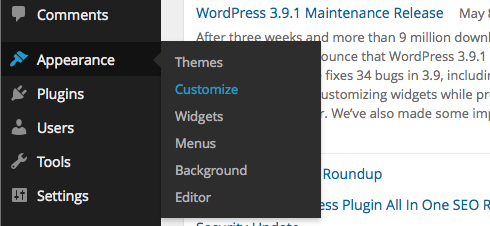
1. Navigate to the WordPress Theme Customizer.
The WordPress Theme Customizer is found in the “Appearance” section of your Dashboard. Navigate to Appearance → Customize and you’ll see a preview of your site on the right side of the screen and a menu of customization options on the left.
You may already be familiar with Theme Customizer. As of WordPress 3.4, it has been part of the WordPress Core, helping you modify your site’s appearance with a WYSIWYG user interface.
What’s changed, however, are the widget areas within the customization menu. Let’s learn how to work with these widget areas.
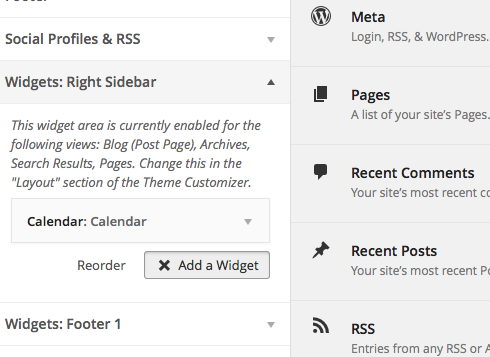
2. Locate the widget area you want to modify.
Depending on your theme, you should have at least one widget area in your Theme Customizer. Some themes will have several – one for each of the theme’s registered widgets.
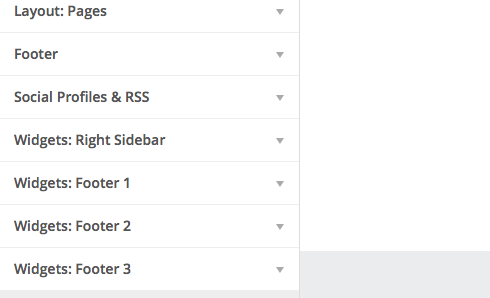
Click on the widget area you want to modify, and you will see a list of the active widgets in your theme. At this point, you can edit the content of individual widgets the same way you would in the old WordPress widget editor. The difference is that the right side of your screen provides a real-time preview of the changes you make!
If you know your theme has multiple widget areas and some of them don’t appear in Widget Management, it’s probably because not all of your widget areas are active on the page you’re previewing in Theme Customizer. By navigating to a different page within the live preview – a page in which the other widget areas are active – you should see those widget areas appear in Widget Management.
3. Add and preview widgets.
To add a new widget, click the “+ Add a Widget” button below your list of active widgets. Now all of your widgets, active and inactive, will appear to the right of the main Theme Customizer area.
You don’t have to drag widgets within the Theme Customizer. Widget Management one-ups the old widget editor by letting you click a widget to make it appear in the widget area you’re modifying.
Any widgets you add will appear below all of the active widgets in your widget area. Then, after adding content to a widget and previewing it on the right side of your screen, you can drag the widget to the position you would ultimately like it to occupy.
Alternatively, you can click “Reorder” at the bottom of the widget area and use the arrows to move widgets up or down according to your preference. The icon to the left of the arrows will even let you move a widget to a totally different widget area (if applicable).
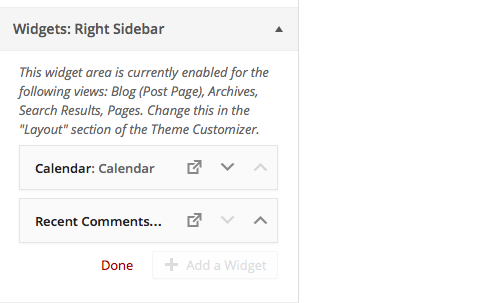
Whether you use these tools to reorder your widgets or stick to drag-and-drop is up to you. Seasoned WordPress users may find the latter method more familiar.
4. Publish your changes.
Added or removed the widgets you need? Previewed all your modifications? Now just click “Save & Publish” at the top of your screen for the changes to take effect.
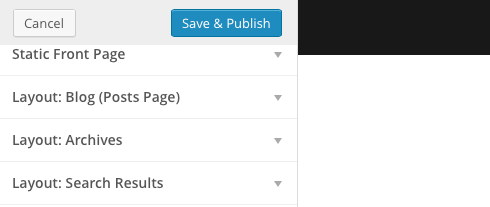
Be careful when you reach this step. If you’re used to the old widget editor, it’s easy to forget that the right side of your screen is a preview and not your live website. Navigating away before clicking “Save & Publish” could mean losing all of your changes!
A much-needed feature
As far as we’re concerned, Widget Management brings a valuable new feature to WordPress. Knowing how widget content will appear prior to publishing it will improve your editorial workflow, eliminate concerns about publishing the wrong content, and help you focus on creative tasks. And for those reticent about change, the old widget editor is still there. Keep using it if you prefer.
Make it better with Make
Our new free drag and drop WordPress theme, Make, works great with the new Widget Management feature. And if you’ve upgrade to Make Plus, you can convert any text column in the page builder to a widget area. This is incredibly powerful feature, and gives you infinite flexibility while assembling your pages.
Image credit: Kevin Dooley Photography
Enjoy this post? Read more like it in Tutorials.