Content widget areas
With Make Plus active, any column in a Content section can be converted into a widget area on your page. This means you can include content you might usually find in a theme sidebar of footer right in your page!
Add a widget area
- Set up a Content section in the page builder.
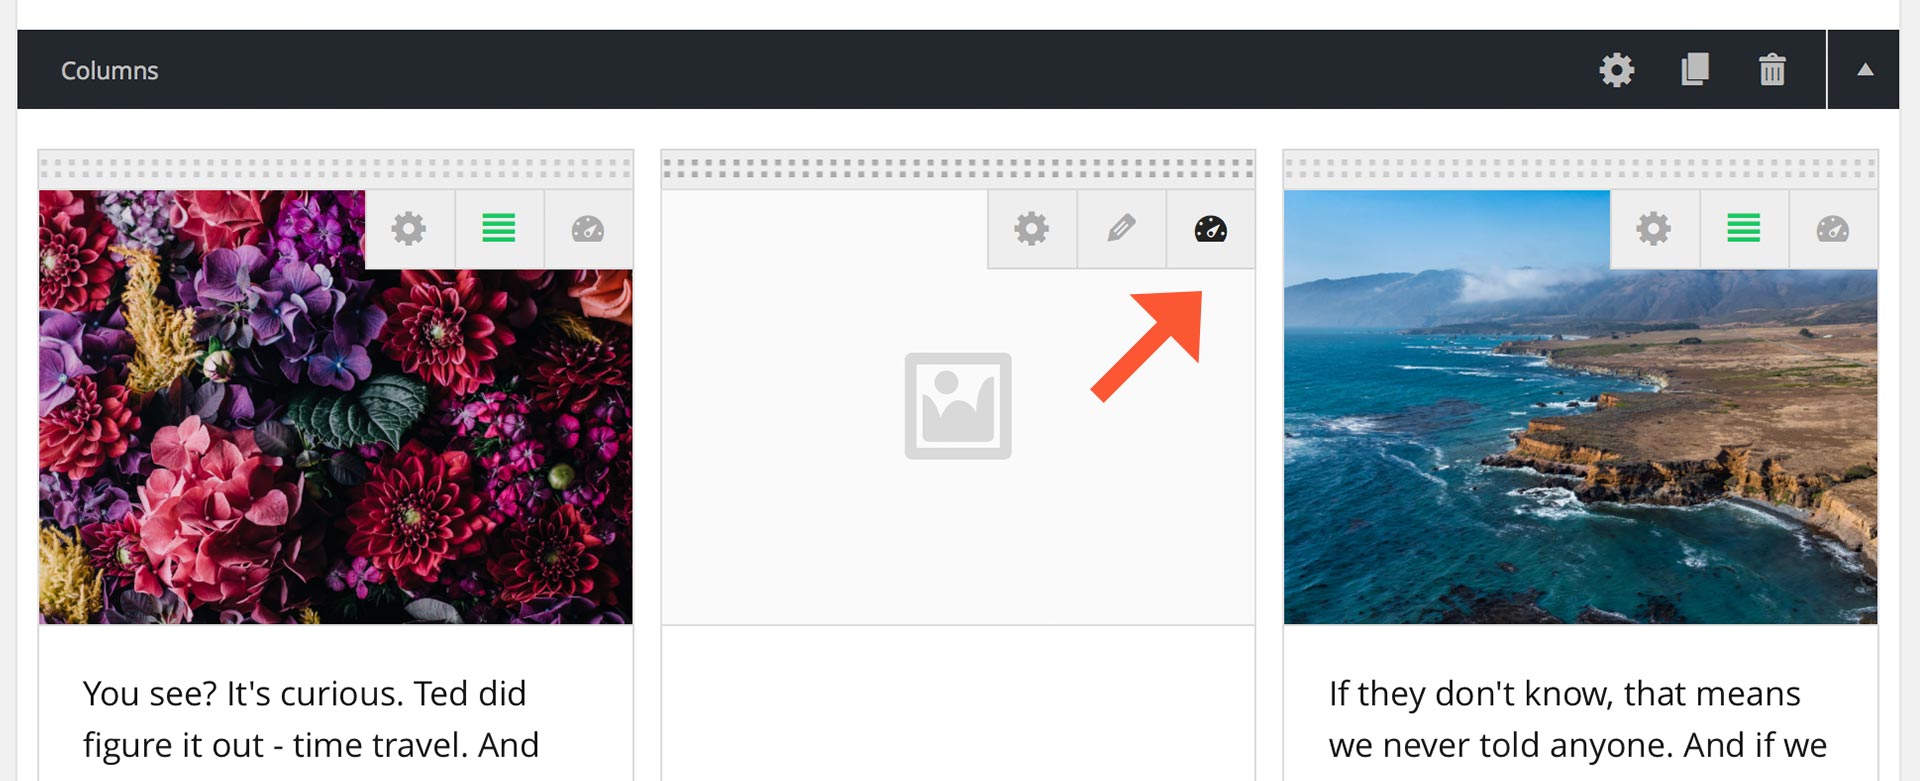
- Convert a column to a widget area by clicking
 in the upper right corner of the column.
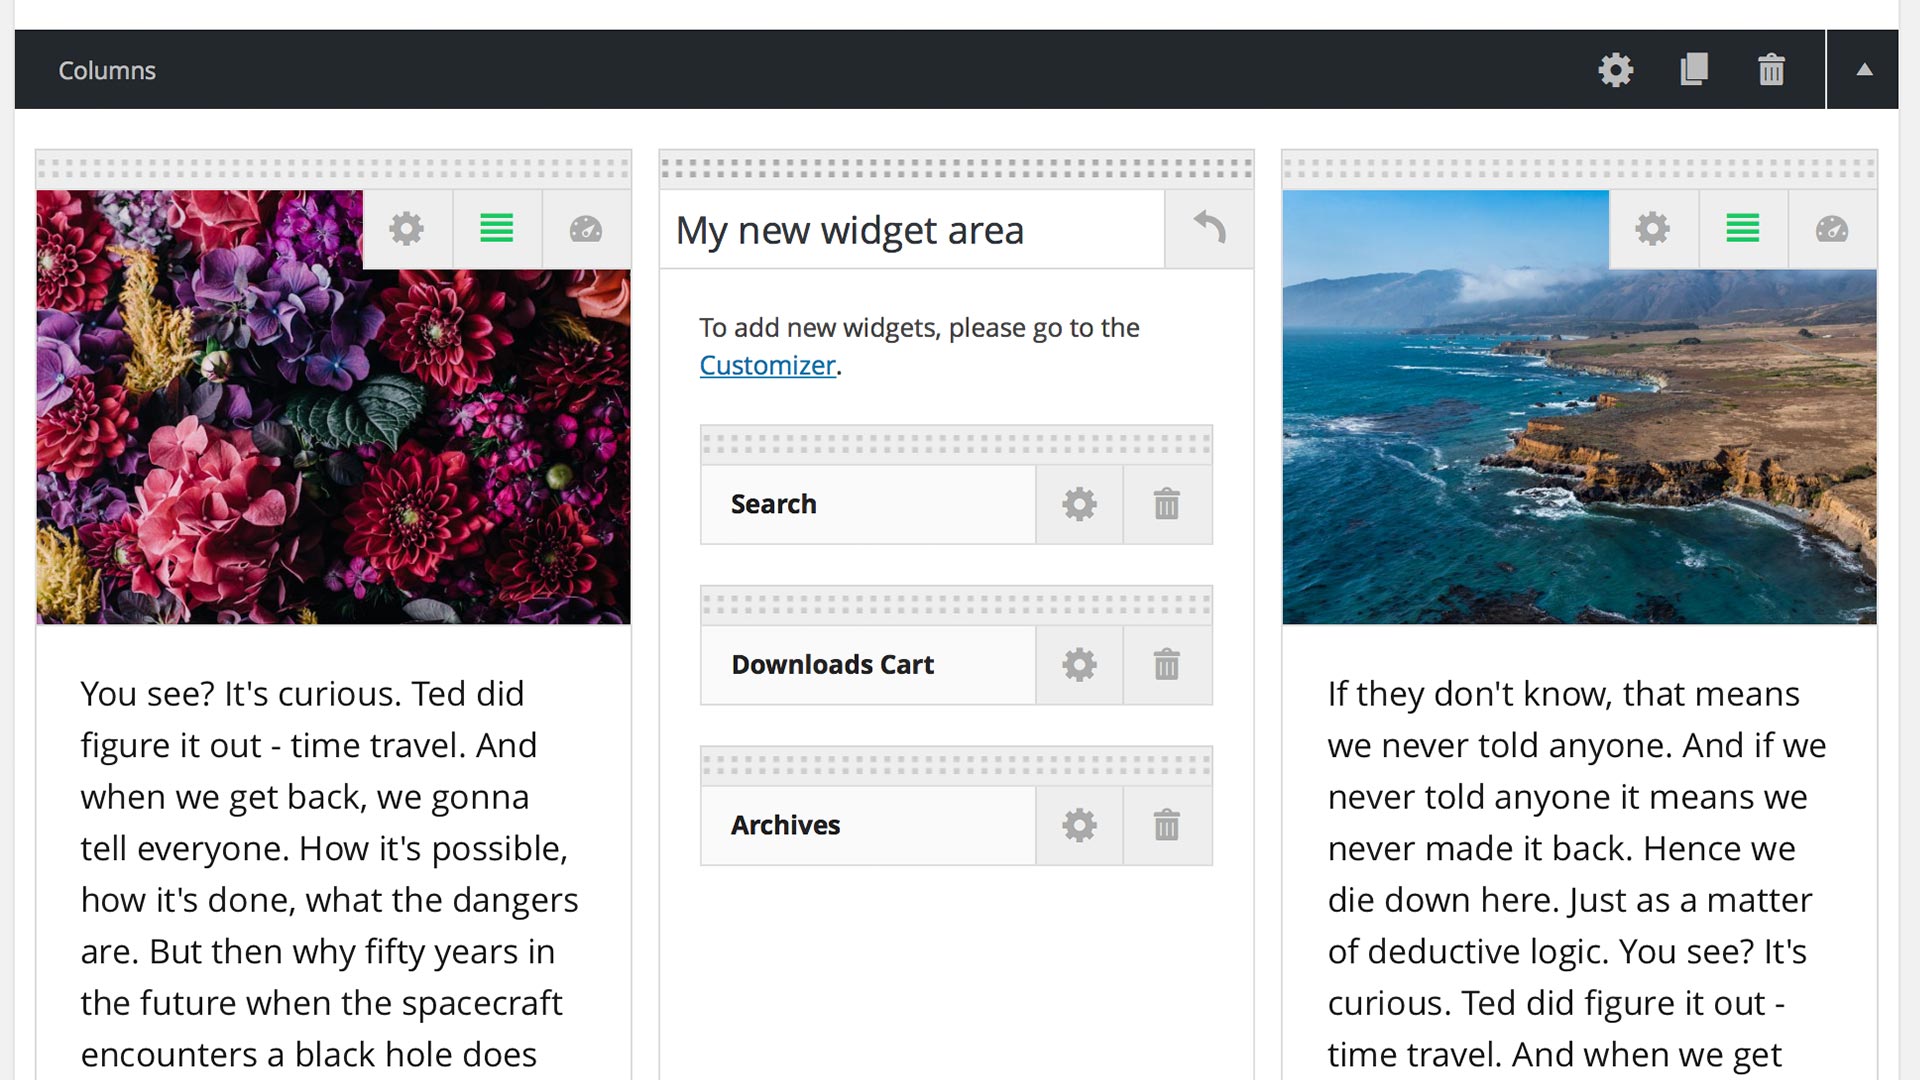
 - Give the widget area a descriptive name so that it’s easy to identify in the WordPress Customizer and Widgets screens. (This name will not appear on the rendered page.)
- Save the widget area by publishing or updating the page.
Add individual widgets
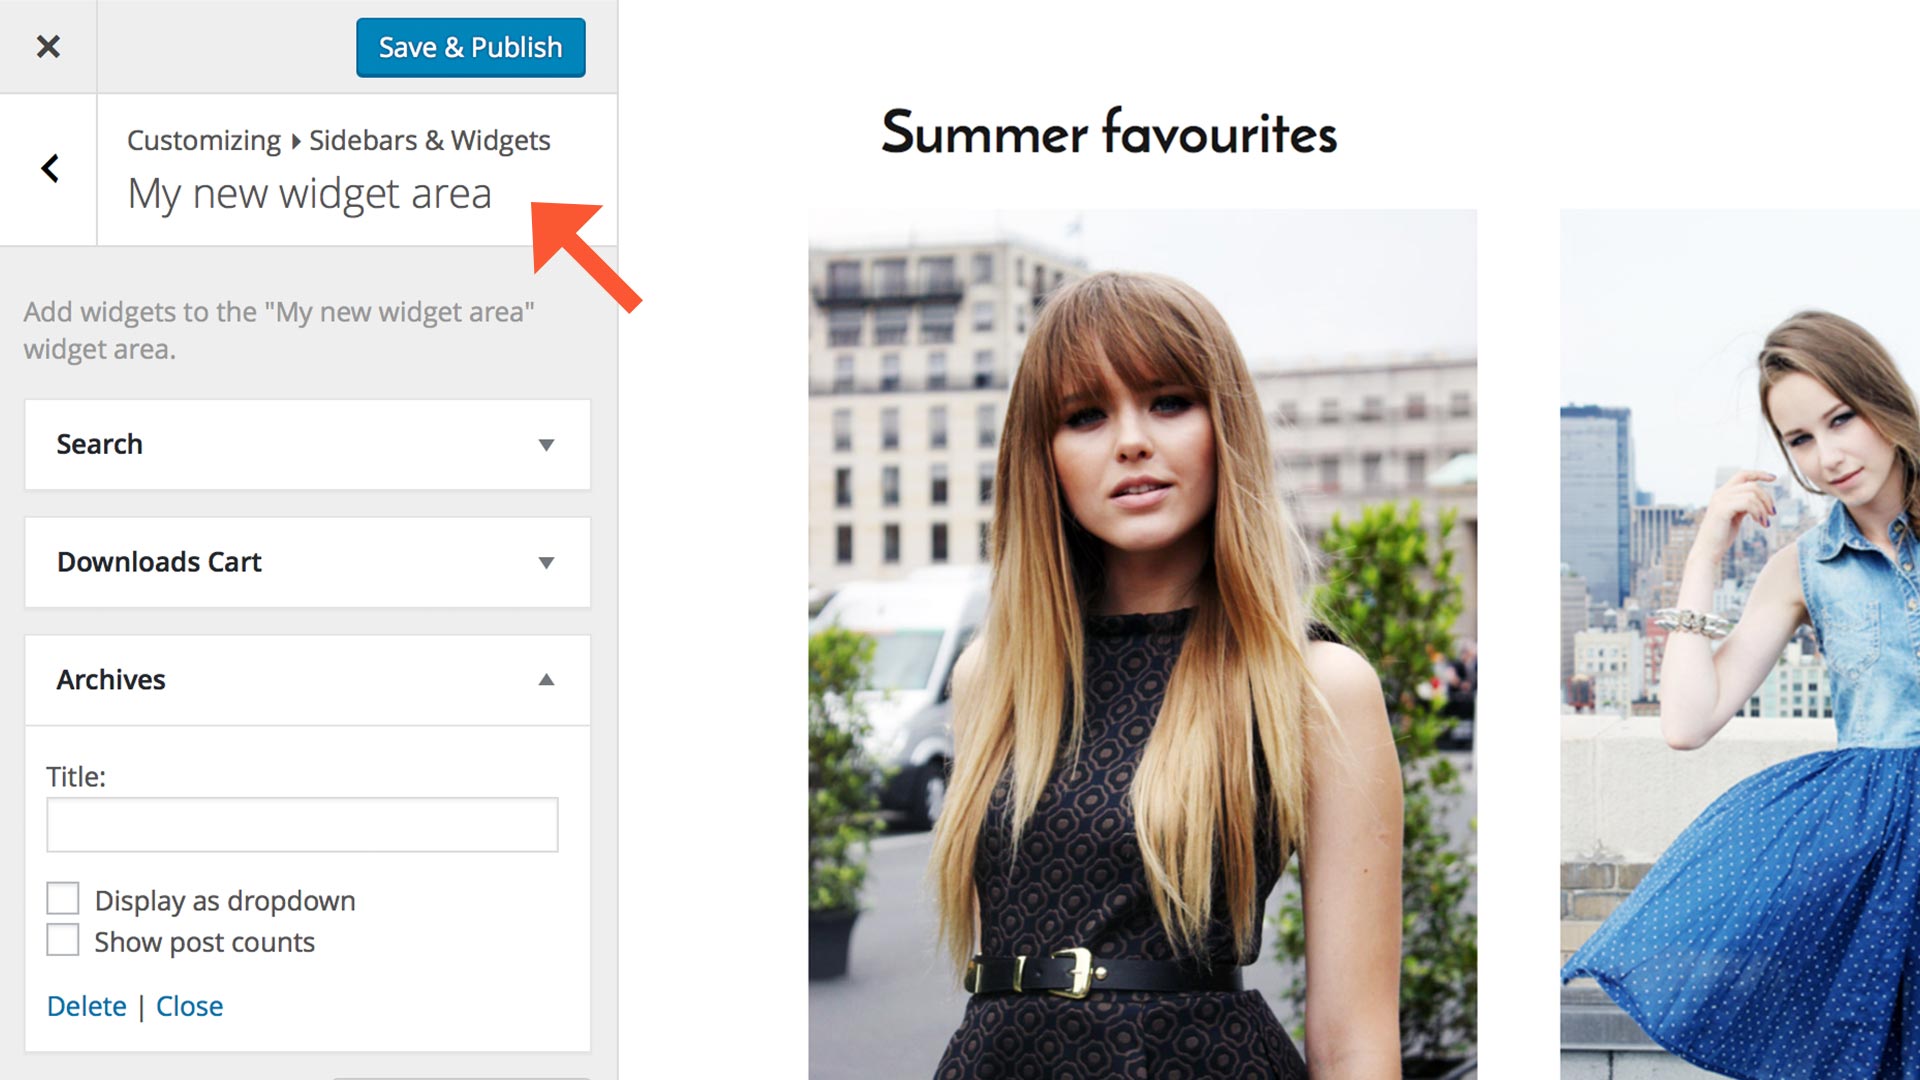
- After the page has been saved, click the link in the empty widget area.
- On the Customizer screen, click the panel.
- Find the widget area you just created and add widgets.
- When you’re finished, save your changes by clicking .
- Click in the upper left corner of the Customizer to close the Customizer and return to your builder page.
Configure an individual widget
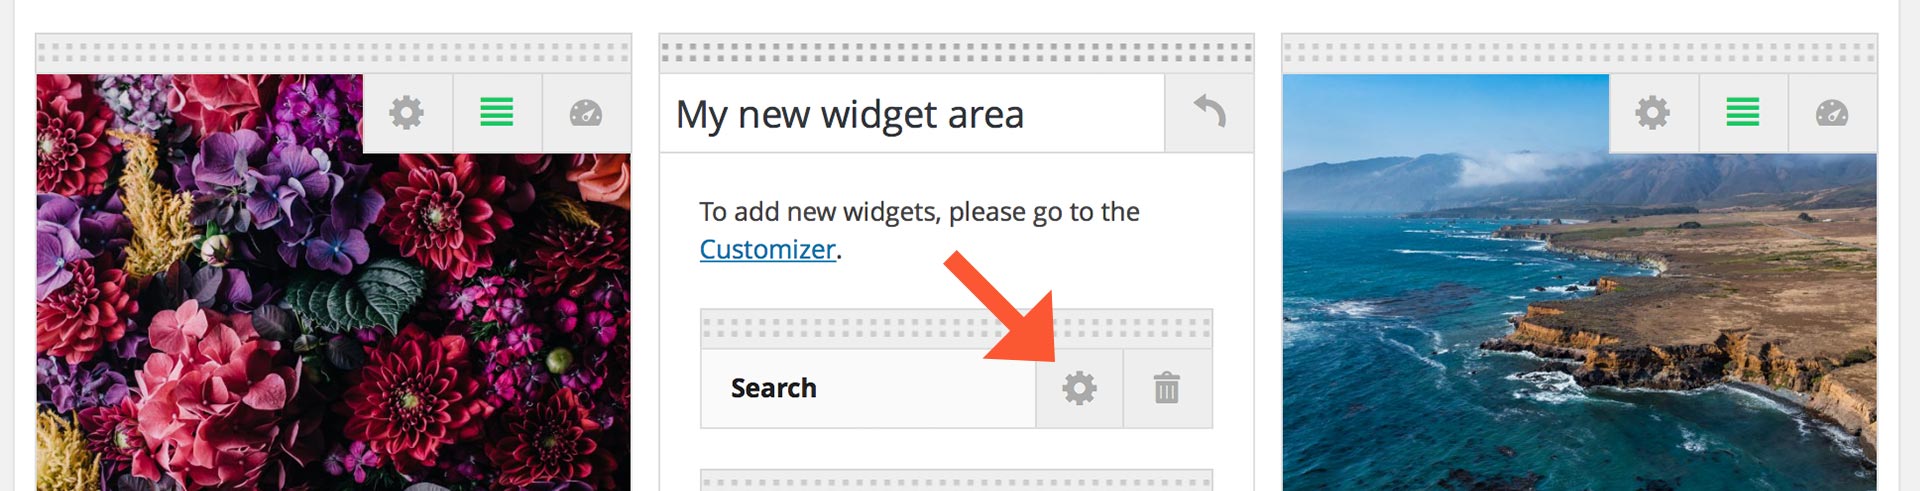
- Click
 to open a window with the widget’s options.
 - When finished, click to close the window.
Reorder an individual widget
- Click and hold on the dotted bar at the top of the widget.
- Drag the widget to a new position. A box with a dashed border indicates where the widget will be when you release the mouse button.
Delete an individual widget
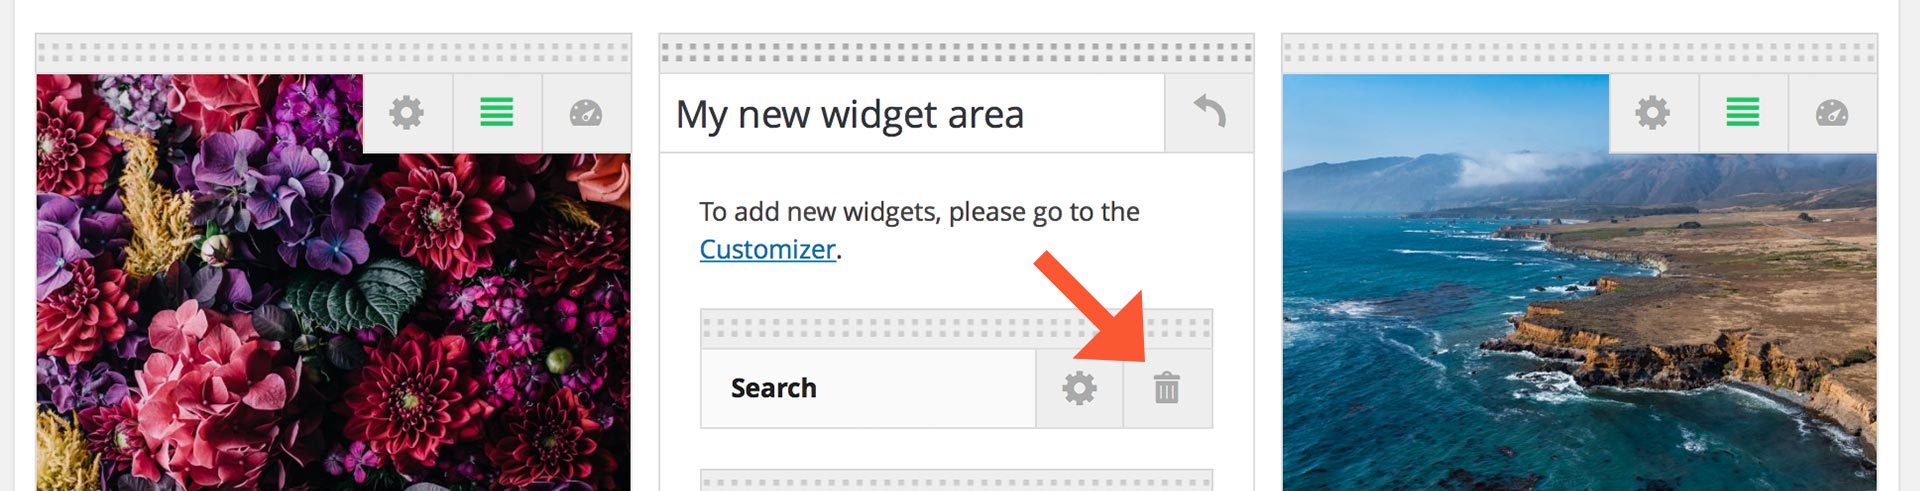
Click  to remove a widget from the widget area.
Remove a widget area

To switch back to a regular column, simply click ![]() at the top of the widget area.
at the top of the widget area.